


To set up product sync using Infusionsoft, click on the sales module that you would like to configure products for, and select Yes for "Use Webhooks?"
Then type in the name and price of the product you would like to log as a sale. Drag a connection from the page that leads to this order/upsell page, as well as a connection to the page that the user goes after buying this product. If you would like to add in more products, click "Add New Product" at the bottom right.
IMPORTANT: If you have an ampersand (&) in your product name you will need to save them with the ASCII characterization version of that delimiter, %26. So if your product name is "books & novels" you would enter it as "books %26 novels". Also, please keep in mind that PIPE (|) character strings are not allowed in the Product Name field to properly work with our webhooks.
Other special Characters:
| $ = %24 | # = %23 | Examples: 100%25 Main Product = 100% Main Product |
| + = %2B | % = %25 | Reselling %2B Training = Reselling + Training |
| / = %2F | | = %7C | Bump Offer%2FUpsell = Bump Offer/Upsell |
| : = %3A | \ = %5C | Training%3EOnboarding = Training>Onboarding |
| ; = %3B | ^ = %5E | |
| ? = %3F | ~ = %7E | |
| @ = %40 | { = %7B | |
| " = %22 | } = %7D | |
| < = %3C | [ = %5B | |
| > = %3E | ] = %5D |
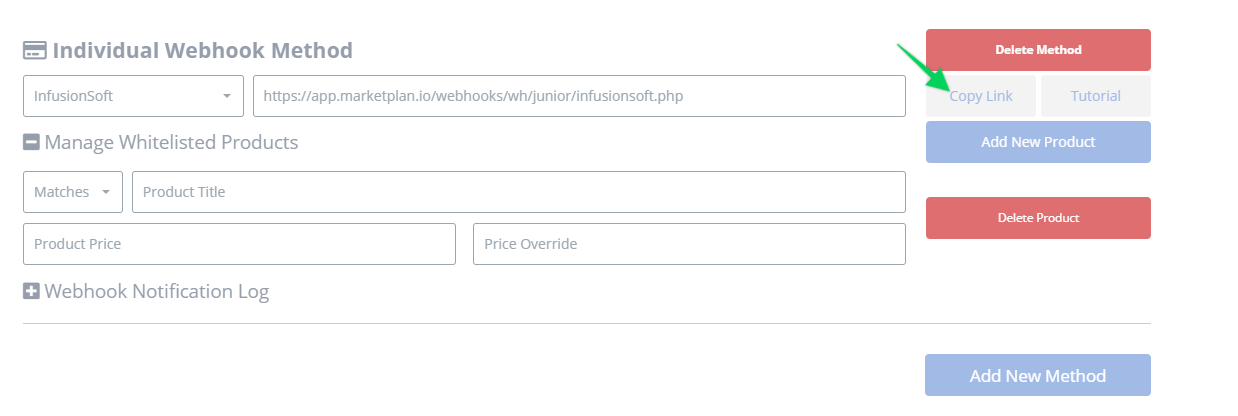
Step 1. Copy the webhook URL generated.

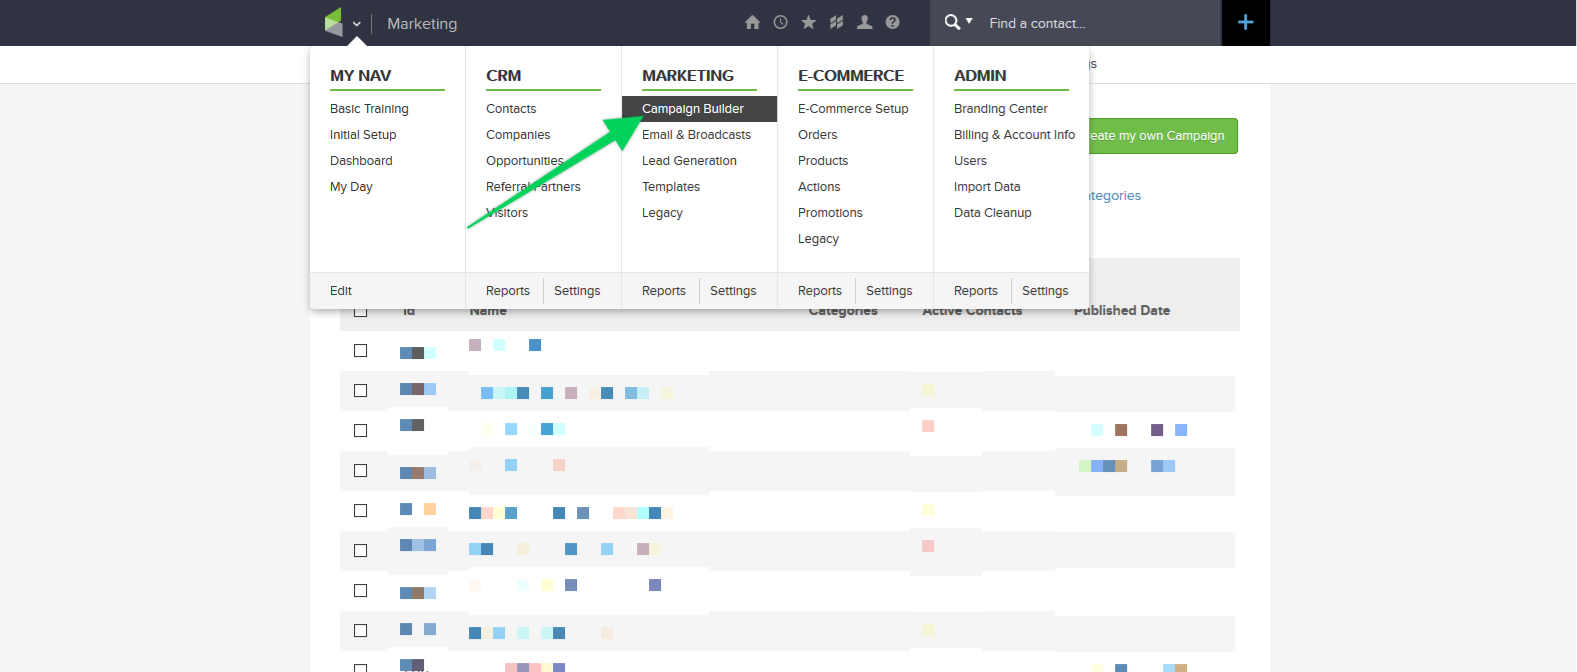
Step 2: Login to your Infusionsoft account. Click on Campaign Builder. Then click on the campaign in which you are wanting to add an HTTP POST to.
Step 3: Once inside your Campaign of choice, you will need to setup the appropriate trigger to activate a sequence where that sequence will send a POST ONLY when a particular product is purchased.
Take a look at our recommendation for this below.
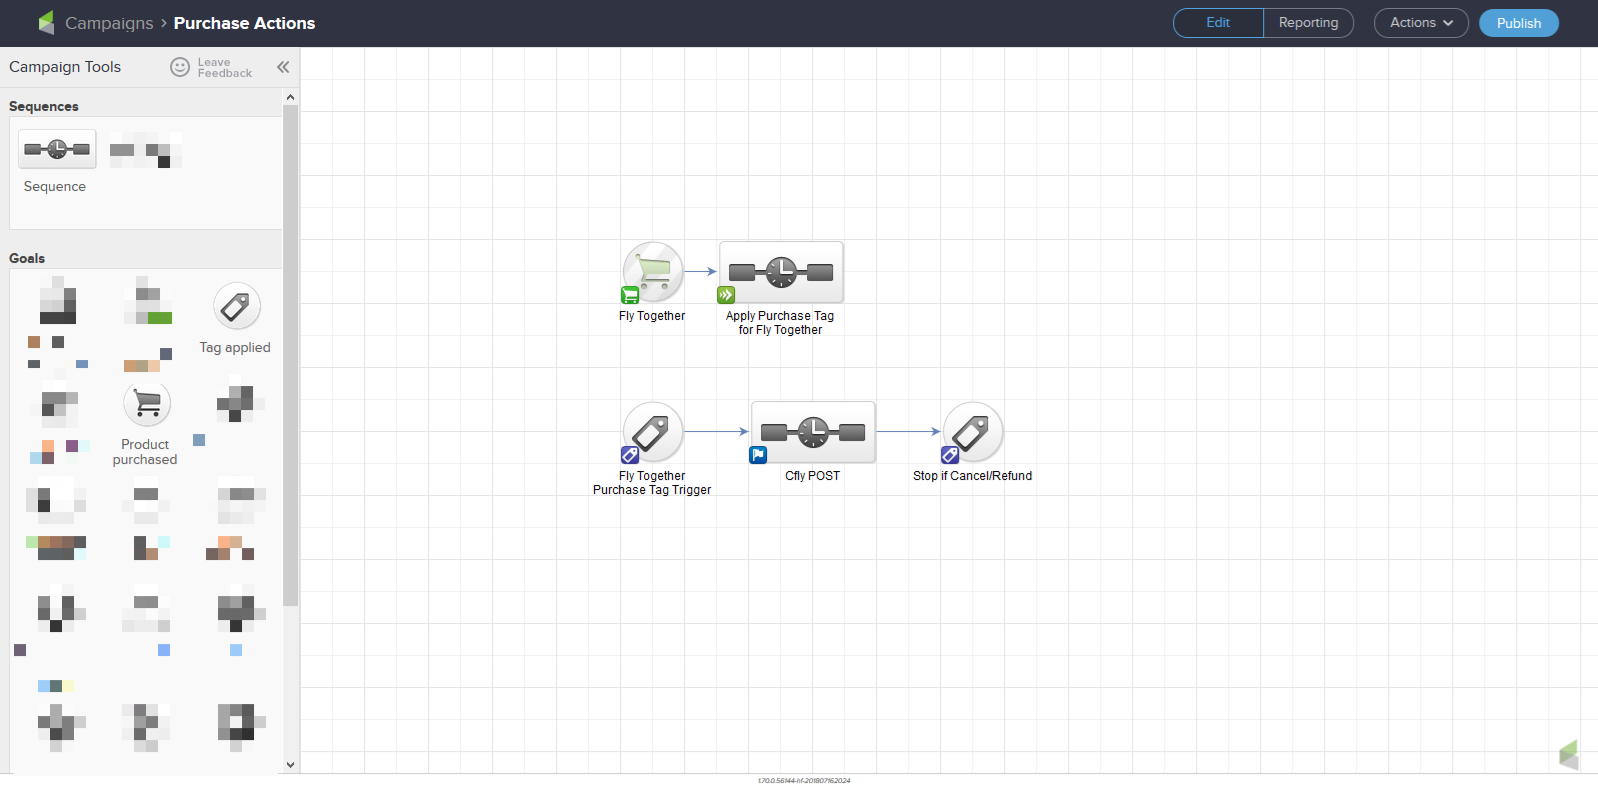
The above configuration is a Product Purchased Trigger firing a sequence that creates a unique tag for a particular product being purchased. For the Product Purchased Trigger you can filter down to an individual payment plan for each product to ensure this sequence is ONLY fired when only the product we are setting up to track is purchased and is NOT accidentally fired when another variation of the product is sold. Notice the green arrows at the bottom left of the sequence indicating that the sequence will complete no matter what follows.
After that tag is created we have another line where upon that same tag is created for a customer, it will trigger the following sequence.
In that sequence, we will put the HTTP POST. (Image Below)
The reason why we are using a Tag Applied Trigger to fire the sequence containing the HTTP POST, is to ensure the POST is not accidentally triggered multiple times for the same customer. Infusionsoft Tag Applied Triggers will only fire upon the FIRST TIME that particular tag has been applied to a customer. Currently there is a long-standing bug in Infusionsoft where using a Product Purchased Trigger will fire multiple times if you are using a subscription product.
All in all… Use your best judgement on figuring out the appropriate trigger. If you have your product being sold in multiple funnels, skip the previous step and try to ensure you use a trigger that will ONLY fire when the product in mention is purchased ONLY when the customer has purchased in the funnel you are setting up.
The method we outline here covers most instances for complex Infusionsoft campaigns. Most users will not need to take this precaution and will be completely okay with just simply using a Product Purchased Trigger to fire a sequence containing our HTTP POST.
Step 4: For the sequence you have setup with the approriate trigger, you will now need to setup an HTTP POST.
Drag the “Send HTTP Post” from the “Process” section into the campaign

For payment plans you can create additional products in-app and set up additional POSTs in this sequence for each product with the appropriate Delay Timer in between each POST to simulate recurring revenue. Notice the blue flag icon in the bottom right of this sequence in the campaign screenshot above. This is intentional to stop this sequence from continuing if the Goal has been achieved after the sequence, which is a Tag Application Goal for whatever tag you use to mark you customers who have refunded or cancelled the payment plan. This stops the sequence in its place so it does not continue to send HTTP POSTs.
Step 5: Click into the HTTP POST in this sequence and PASTE the URL that was generated for you into the “POST URL” field.
To create your product ensure the Infusionsoft Notification POST section is set to “Yes”. This will allow you to add in your product name and price of choice.
The product name and price does not necessarily have to match what product name and price you have in Infusionsoft. You can leverage this to have the product name be something more identifiable for you when you review your metrics. The price you enter will directly correspond to the revenue calculated.
We all know due to the nature of Infusionsoft, there is plenty of ways to accomplish the same task. We put this together to give the most “safe” set-up (not necessarily the easiest) with our Product-Sync Integration with Infusionsoft.
Please feel free to reach out to us about your unique Infusionsoft situation if you have questions beyond this.