


To set up product sync using Stripe, click on the sales module that you would like to configure products for, and select Yes for "Use Webhooks?"
Then type in the name and price of the product you would like to log as a sale. Drag a connection from the page that leads to this order/upsell page, as well as a connection to the page that the user goes after buying this product. If you would like to add in more products, click "Add New Product" at the bottom right.
IMPORTANT: If you have an ampersand (&) in your product name you will need to save them with the ASCII characterization version of that delimiter, %26. So if your product name is "books & novels" you would enter it as "books %26 novels". Also, please keep in mind that PIPE (|) character strings are not allowed in the Product Name field to properly work with our webhooks.
Other special Characters:
| $ = %24 | # = %23 | Examples: 100%25 Main Product = 100% Main Product |
| + = %2B | % = %25 | Reselling %2B Training = Reselling + Training |
| / = %2F | | = %7C | Bump Offer%2FUpsell = Bump Offer/Upsell |
| : = %3A | \ = %5C | Training%3EOnboarding = Training>Onboarding |
| ; = %3B | ^ = %5E | |
| ? = %3F | ~ = %7E | |
| @ = %40 | { = %7B | |
| " = %22 | } = %7D | |
| < = %3C | [ = %5B | |
| > = %3E | ] = %5D |
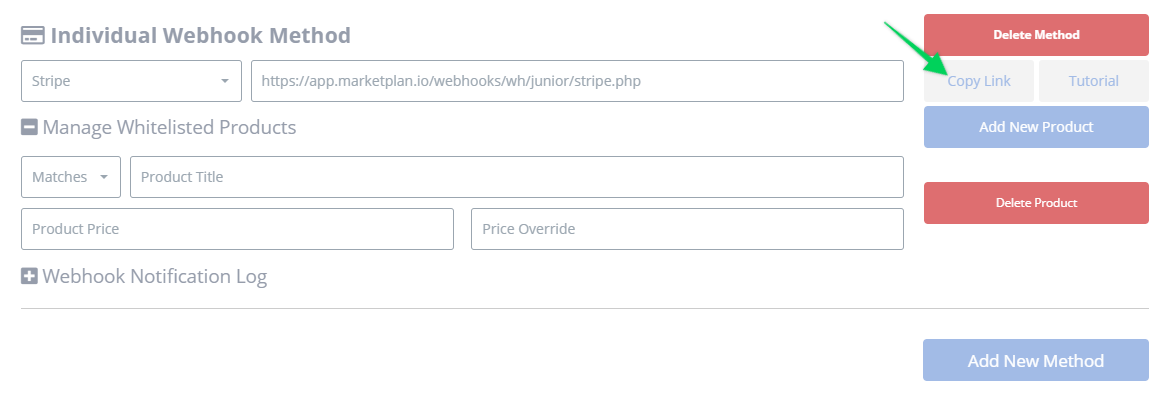
NOTE: In order for sales to be logged correctly, the product names and prices will need to match exactly how they're set up inside Stripe.
Step 1. Copy the webhook URL generated.
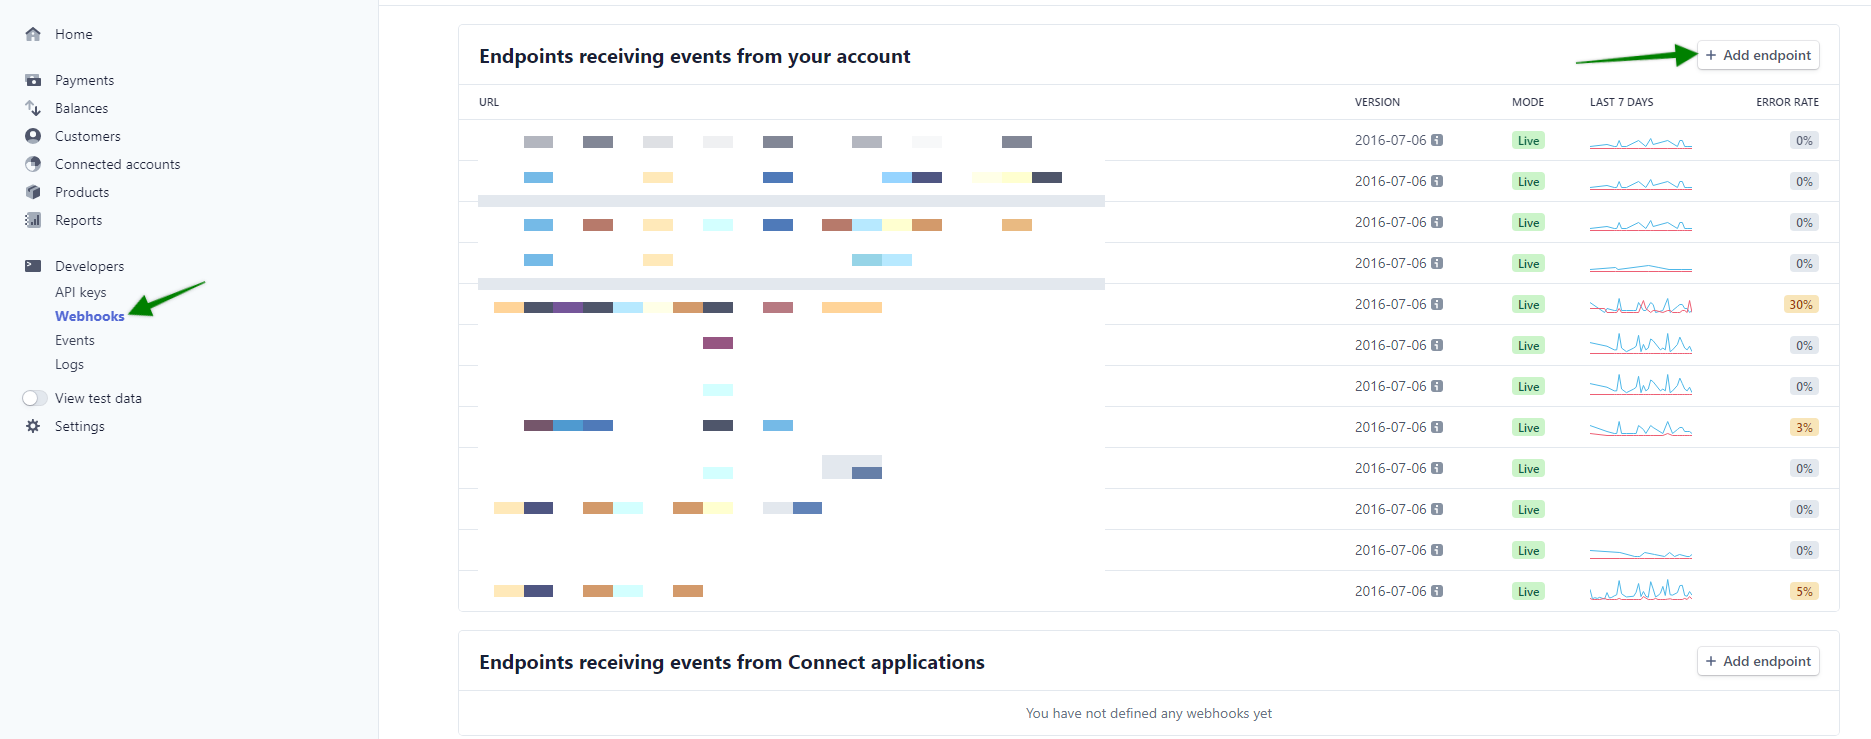
Step 2. Inside Stripe, go to Developers > Webhooks > Add endpoint.
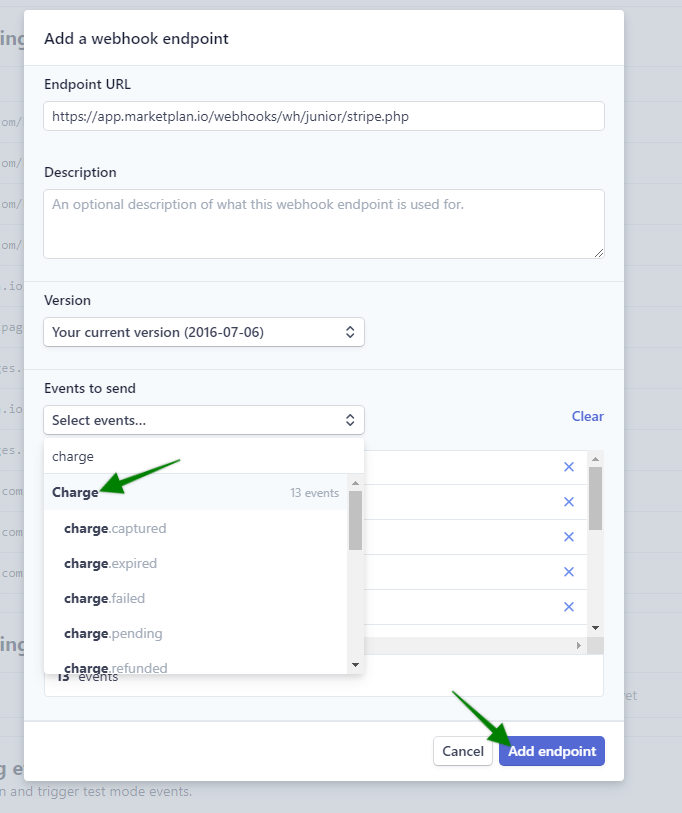
Step 3. Paste your Notification URL, ensure ALL "Charge" events are set to be sent. This should be set to send a total of 13 events exactly. Then click Add Endpoint.
As soon as Stripe processes a transaction it will send us the webhook with all the necessary information we need to credit a sale!