


Using the "ProductSync" option for "webhooks" sales tracking in MarketPlan allows you to connect virtually any payment processor to your funnels into MarketPlan!
If you are not a developer, using marketing automation platforms such as Zapier, Integrately, Pabbly Connect, Integromat and more can help you easily create a direct Product-Sync integration with your online and/or offline sales flow for accurate sales tracking.
Technically speaking, we need you to POST a webhook to us whenever a sale happens for your campaign to tell MarketPlan to log a sale.
This is something you can do yourself simply by leveraging automations apps such as the apps mentioned above.
If you are not familiar with "webhooks" or these type of automation tools, this is something that can be done by your developer. Otherwise, please reach out to our team if you have any questions getting this set up!
How to Set Up:
If you are familiar with webhooks, automation platforms such as Zapier, or currently utilize a CRM for your business, this process can take only a few minutes to properly implement.
If you are unfamiliar with working with these platforms, or are just getting started with tracking your marketing online, please contact our support team for more personalized instructions for working with MarketPlan’s Live Mode Analytics and our ProductSync technology.
1. Start in MarketPlan
To get started with ProductSync inside of MarketPlan, check to see if you are in Live Mode, and then click on your desired Sales Module.
Then select either Webhook or Universal Tracking.
From the Select Method dropdown, choose ProductSync, then copy your Webhook Receiver URL to use later when you create your Webhook.
Next enter your Product Title and Product Price. You will also use this information when setting up your Webhook inside of your automation platform.
2. Create a Webhook
Using an automation platform such as Zapier, you will create a webhook that will POST to MarketPlan, so that we can log a sale from your payment processor.
- Create a Trigger
To create a Webhook, you will need to set up a Trigger that will tell the automation platform to POST your Webhook to MarketPlan.
As said earlier, if you are already using a CRM or another system to gather customer data such as email, IP address, and purchase information, your trigger would be based off of an action you determine inside of your autoresponder or CRM.
In this example, our trigger is based off of a tag created inside of Gist when a purchase is made of our test product “Widget”. Then we filter purchases if they contain our specific product name to pass through to the Webhook.
- Enter Webhook Data
Next, you will need to enter the data you would like to pass through the Webhook.
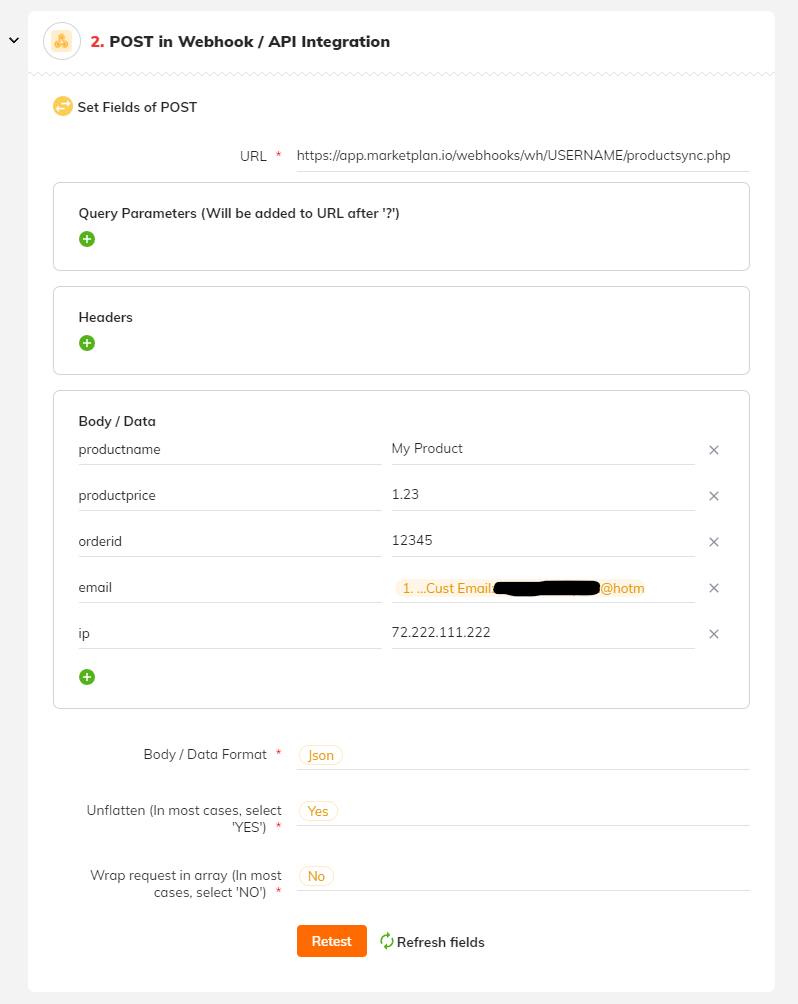
Paste the Webhook Receiver URL into the URL field, choose your payload type which needs to either be a basic form POST or a json array, and then enter the rest of the data for your Webhook.
- Test Your Webhook
Once all of your information is entered, you can save your Webhook, and test the action inside of your automation platform.
If done correctly, and all of your product information from MarketPlan matches with your Webhook, your test will appear inside of MarketPlan right underneath your product information in the Webhook Notification Log.
With everything set up properly, you are now ready to track your offline sales inside of MarketPlan using virtually any payment processor. :)
Here are two examples of an example POST Action configured in Zapier and Integrately:
ZapierPOST Action Example: 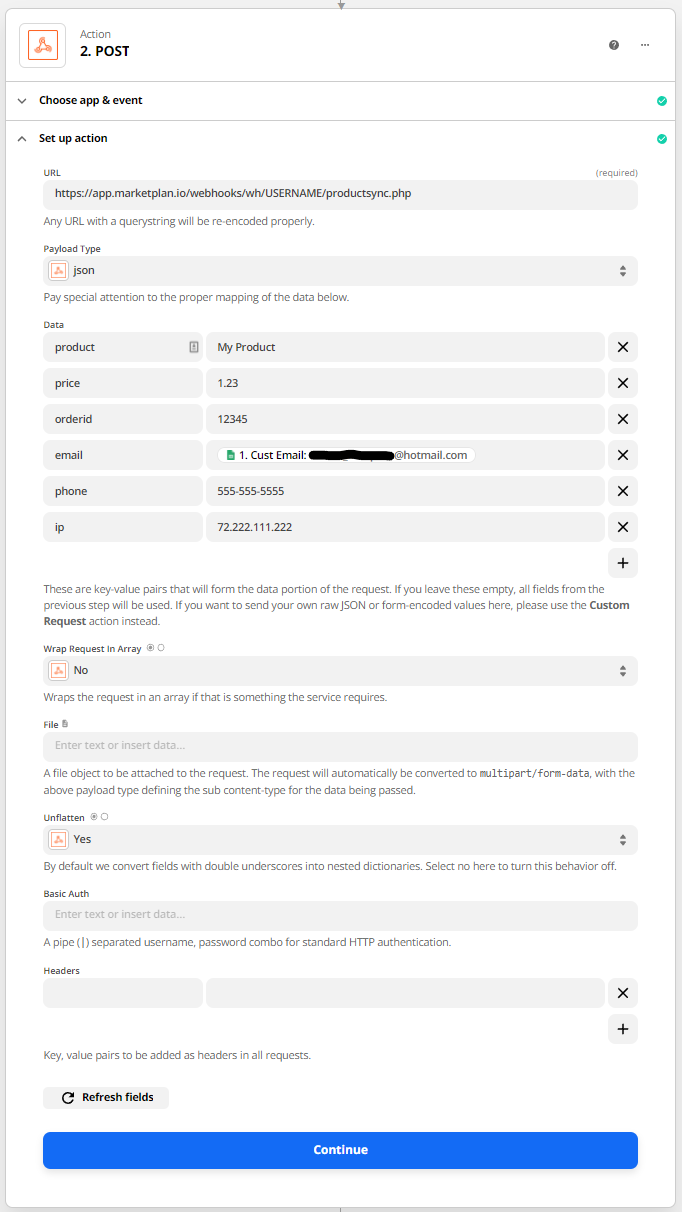 | IntegratelyPOST/Webhook Setup Example:
|
IMPORTANT: If you have an ampersand (&) in your product name you will need to save them with the ASCII characterization version of that delimiter, %26. So if your product name is "books & novels" you would enter it as "books %26 novels". Also, please keep in mind that PIPE (|) character strings are not allowed in the Product Name field to properly work with our webhooks.
Other special Characters:
| $ = %24 | # = %23 | Examples: 100%25 Main Product = 100% Main Product |
| + = %2B | % = %25 | Reselling %2B Training = Reselling + Training |
| / = %2F | | = %7C | Bump Offer%2FUpsell = Bump Offer/Upsell |
| : = %3A | \ = %5C | Training%3EOnboarding = Training>Onboarding |
| ; = %3B | ^ = %5E | |
| ? = %3F | ~ = %7E | |
| @ = %40 | { = %7B | |
| " = %22 | } = %7D | |
| < = %3C | [ = %5B | |
| > = %3E | ] = %5D |
Product-Sync API Documentation:
HTTP POST as either raw or JSON.
Required:
| product | Your product's name |
| price | Price of product in your project's currency |
| Customer email (used for Lossless Tracking) |
Strongly recommended:
| ip | Customer IP address (used for more accurate sales tracking & attribution) |
| orderid | The unique ID of the order so that we can distinguish this from other sales |
Recommended (not currently in use):
| refund | |
| quantity | |
| productid | |
| ordertotal | |
| currency |
Optional (for Sales Pipleline and CRM tracking features coming soon!):
| firstname | |
| lastname | |
| phone | |
| country | |
| billingaddress | |
| billingcity | |
| billingstate | |
| billingzip | |
| billingcountry | |
| shippingaddress | |
| shippingcity | |
| shippingstate | |
| shippingzip | |
| shippingcountry | |
| shippingcost | |
| tax | |
| merchantfee | |
| cctype | |
| cvccheck | |
| last4 | |
| expmonth | |
| expyear |